
How To Install Cable Trays
26th Feb 2026
If you’re setting up or tidying up your building wiring, cable trays will be an important part of the process.
But what’s the best way to install them?
This guide will ensure the process goes smoothly for you, and we’ll include a few expert tips along the way.
Step 1: Assessing the Installation Environment
Planning is essential, and you can’t do that without fully knowing the environment you plan to wire.
Consider the following factors, which will impact how the installation goes, and the longevity of the system:
- Space Constraints: Measure the available space (accurately), confirming there’s enough room for the tray and the tools needed for installation and maintenance. If you plan on extending it in the future, plan this into your layout, so you can predict future accessibility issues.
- Load Requirements: Calculate the total weight the tray will need to support, including cables and any potential additional loads, as using this you can gauge where and how to fit supports, and which materials to choose. Making sure the tray can handle this weight without deformation is key to preventing serious problems down the line.
- Environmental Factors: Select the tray material based on the conditions it will face. For instance, in areas prone to moisture or chemical exposure, opt for corrosion-resistant/galvanised materials. Consider how thermal expansion and contraction will impact it, if it’s installed near heat sources or regularly opened doorways.
Accounting for these factors will help ensure the tray system remains functional and durable over time.
Step 2: Selecting the Right Cable Tray
There are various types of cable trays available, each having unique characteristics that will fit different environments and cable setups:
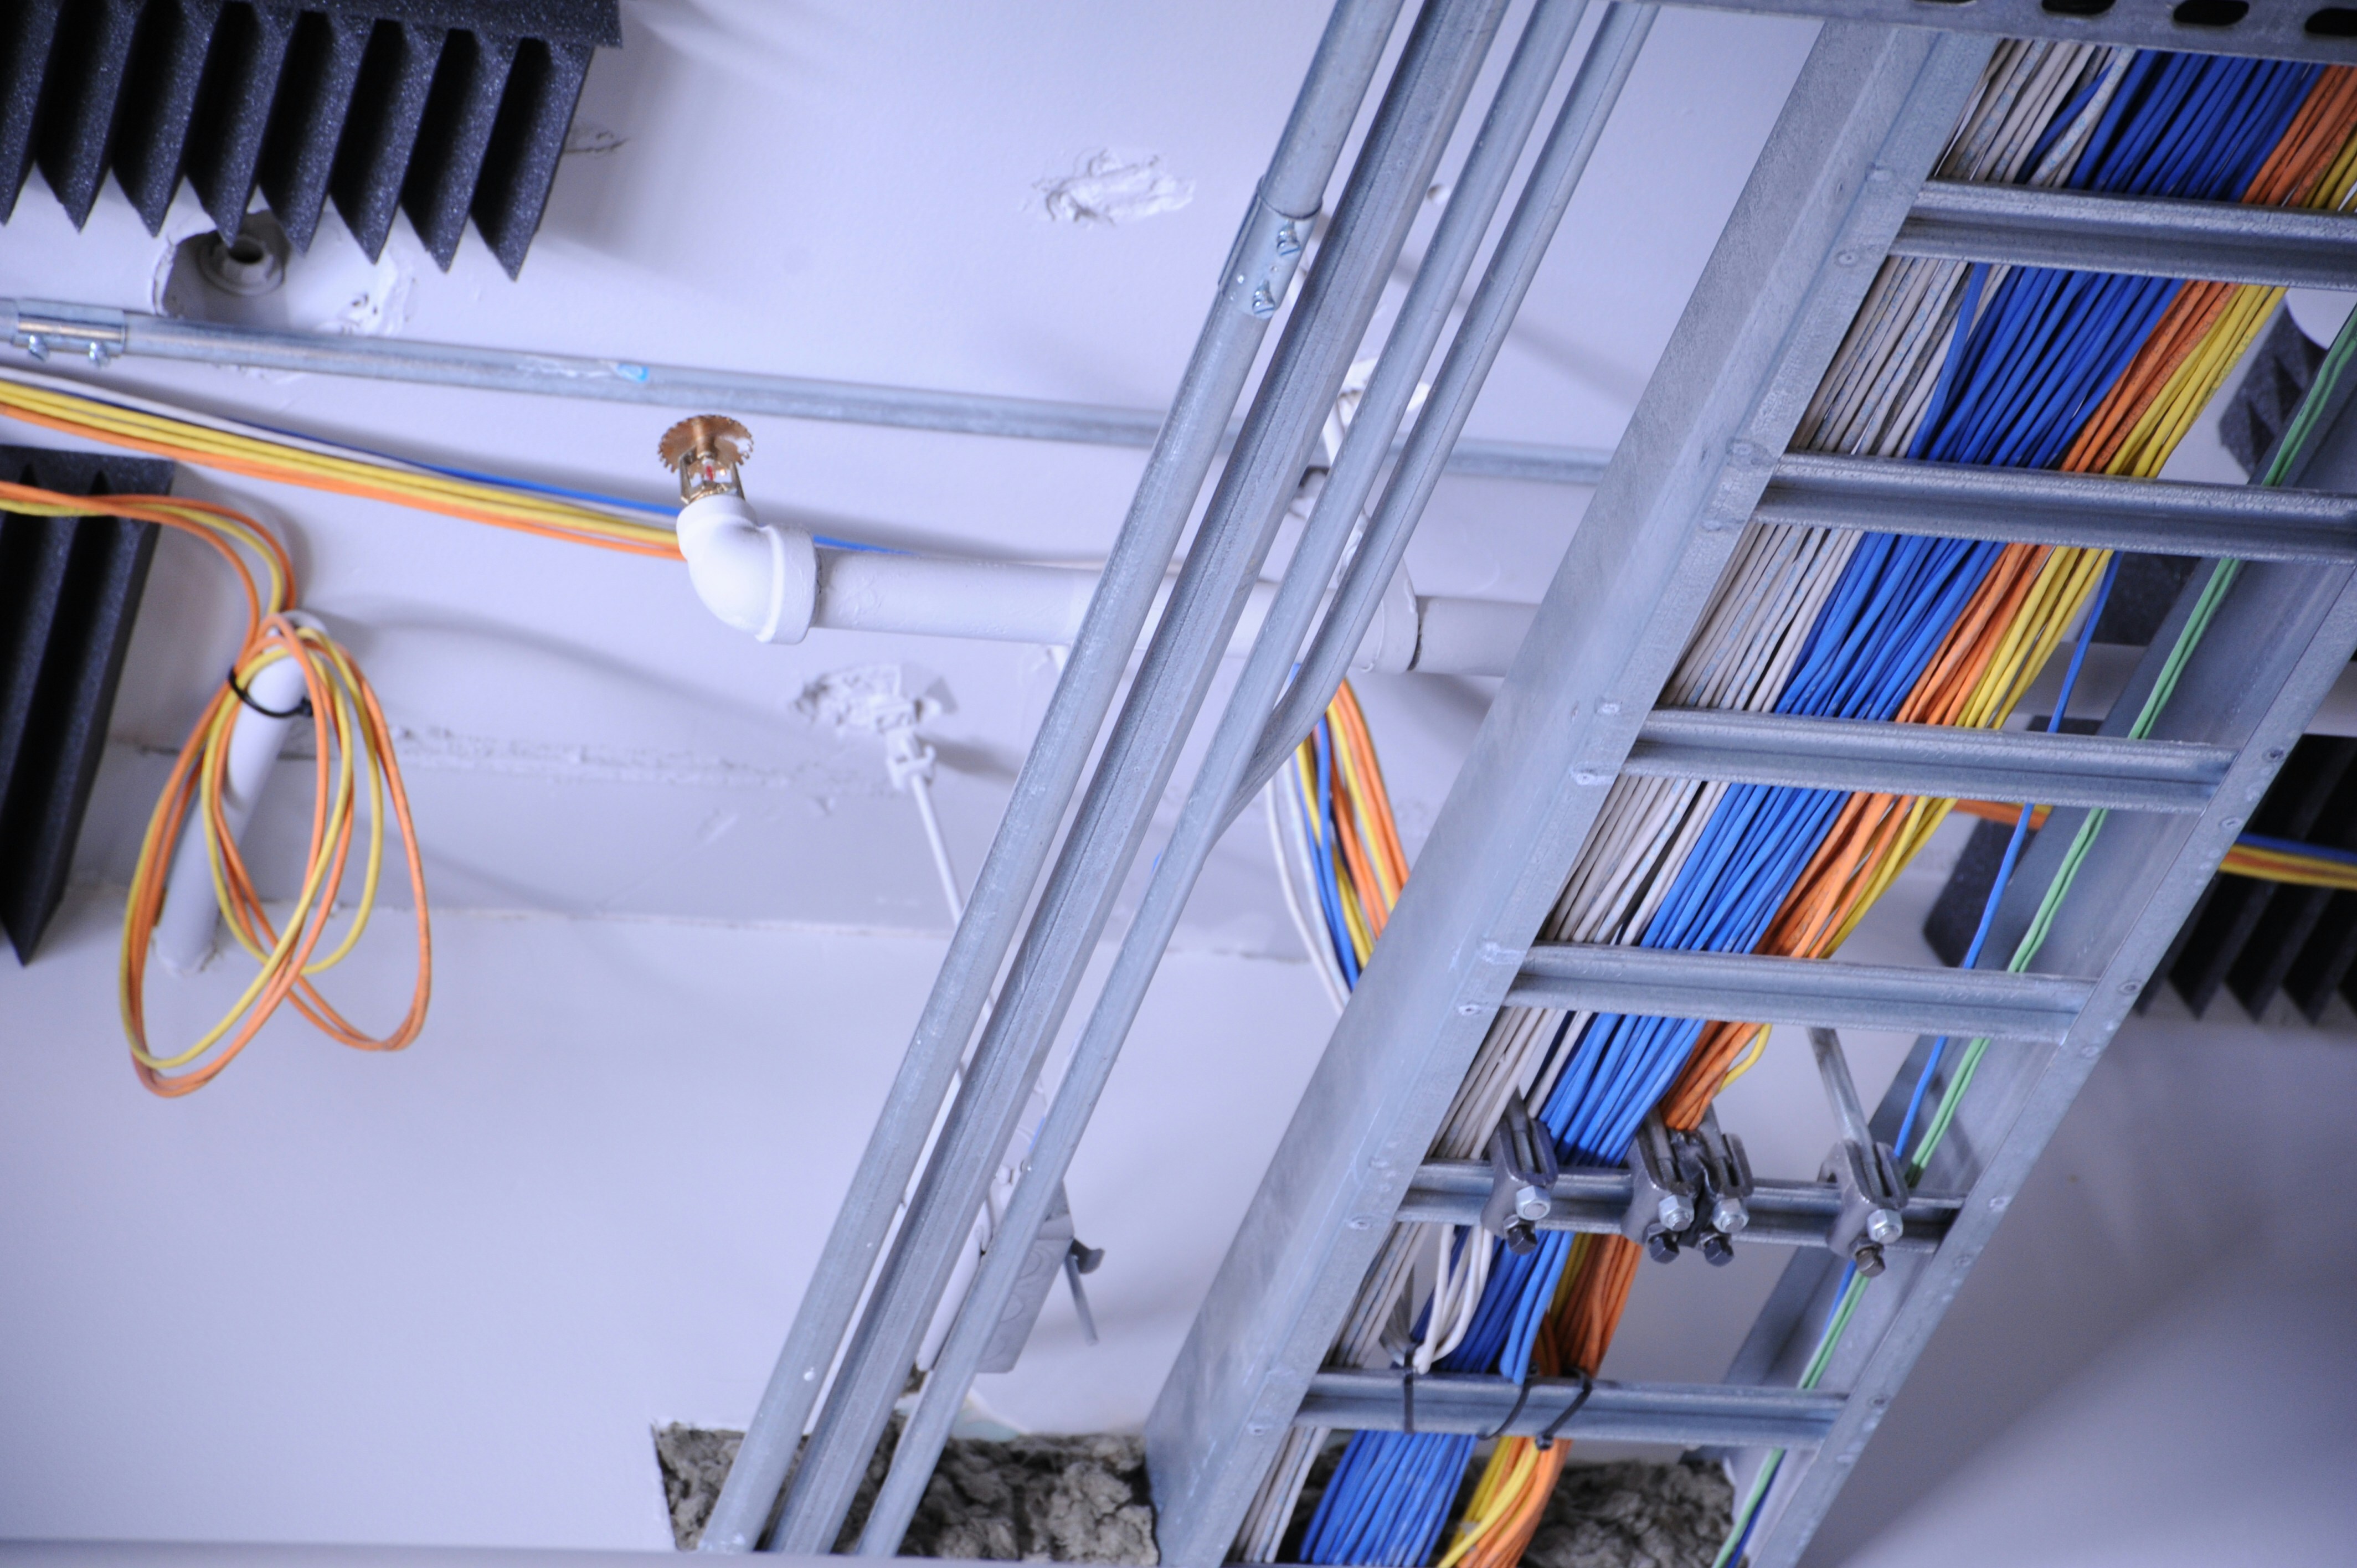
- Ladder Tray: Best suited for large, heavy-duty cables, offering easy access for maintenance and modifications. They also won’t require cuts for cable exits. However, consider the potential for cable droop, especially with heavier cables. Additional support or configurations may be necessary to prevent this.
- Solid Bottom Tray: Ideal for sensitive cables requiring protection from dust and electromagnetic interference. Be mindful of heat retention, particularly when running power cables, and consider ventilation options to account for this.
- Trunking Tray: Offers a balance between support and protection, particularly useful in confined spaces or where cable routing is complex. The sides of the tray help guide cables and prevent excessive bending, and there are openings spaced throughout that can be easily cut for cable exits.
Choosing the correct tray ensures the system remains reliable and reduces the need for future adjustments.
Step 3: Planning the Layout
The planning stage of this will help prevent hiccups during the installation process. Here are the important steps to consider:
- Shortest Path: You should aim for the shortest cable path possible for the outlets you want to install without jeopardising the integrity or security of the cabling. Electromagnetic disturbances can be mitigated by earthing them properly.
- Avoiding Obstacles: Plan routes that avoid structural elements, machinery vibrations, and heat sources. Offsets or cantilever arms can help maintain sufficient clearance and avoid future conflicts with other systems.
- Access Points: Design the tray system with easy access for future maintenance, particularly at joints, bends, or where cables exit the tray. Removable sections or hinged covers help to provide convenient access while maintaining system integrity.
Advanced layout planning helps prevent complications during installation and supports long-term system maintenance.
Step 4: Securing the Cable Tray

The next step is to secure the cable tray in place. Doing this properly helps maintain the structural integrity of the installation:
- Marking Mounting Points: Mark the locations where the tray supports will be attached, confirming they align properly, then securely anchoring them to load-bearing structures. Consult a structural engineer if necessary to confirm the suitability of mounting surfaces.
- Installing Supports: Choose anchors appropriate for the wall or ceiling material you’re attaching them to, ensuring they can handle both static and dynamic loads (based on your plan). Use vibration-damping mounts in environments with significant vibrations to protect the tray and cables, which is particularly important in factories.
- Mounting the Tray Sections: Ensure each section is level and properly aligned before tightening connections. This prevents issues with cable routing and supports even weight distribution across the system, and will save headaches later on. Each section should also be bonded together.
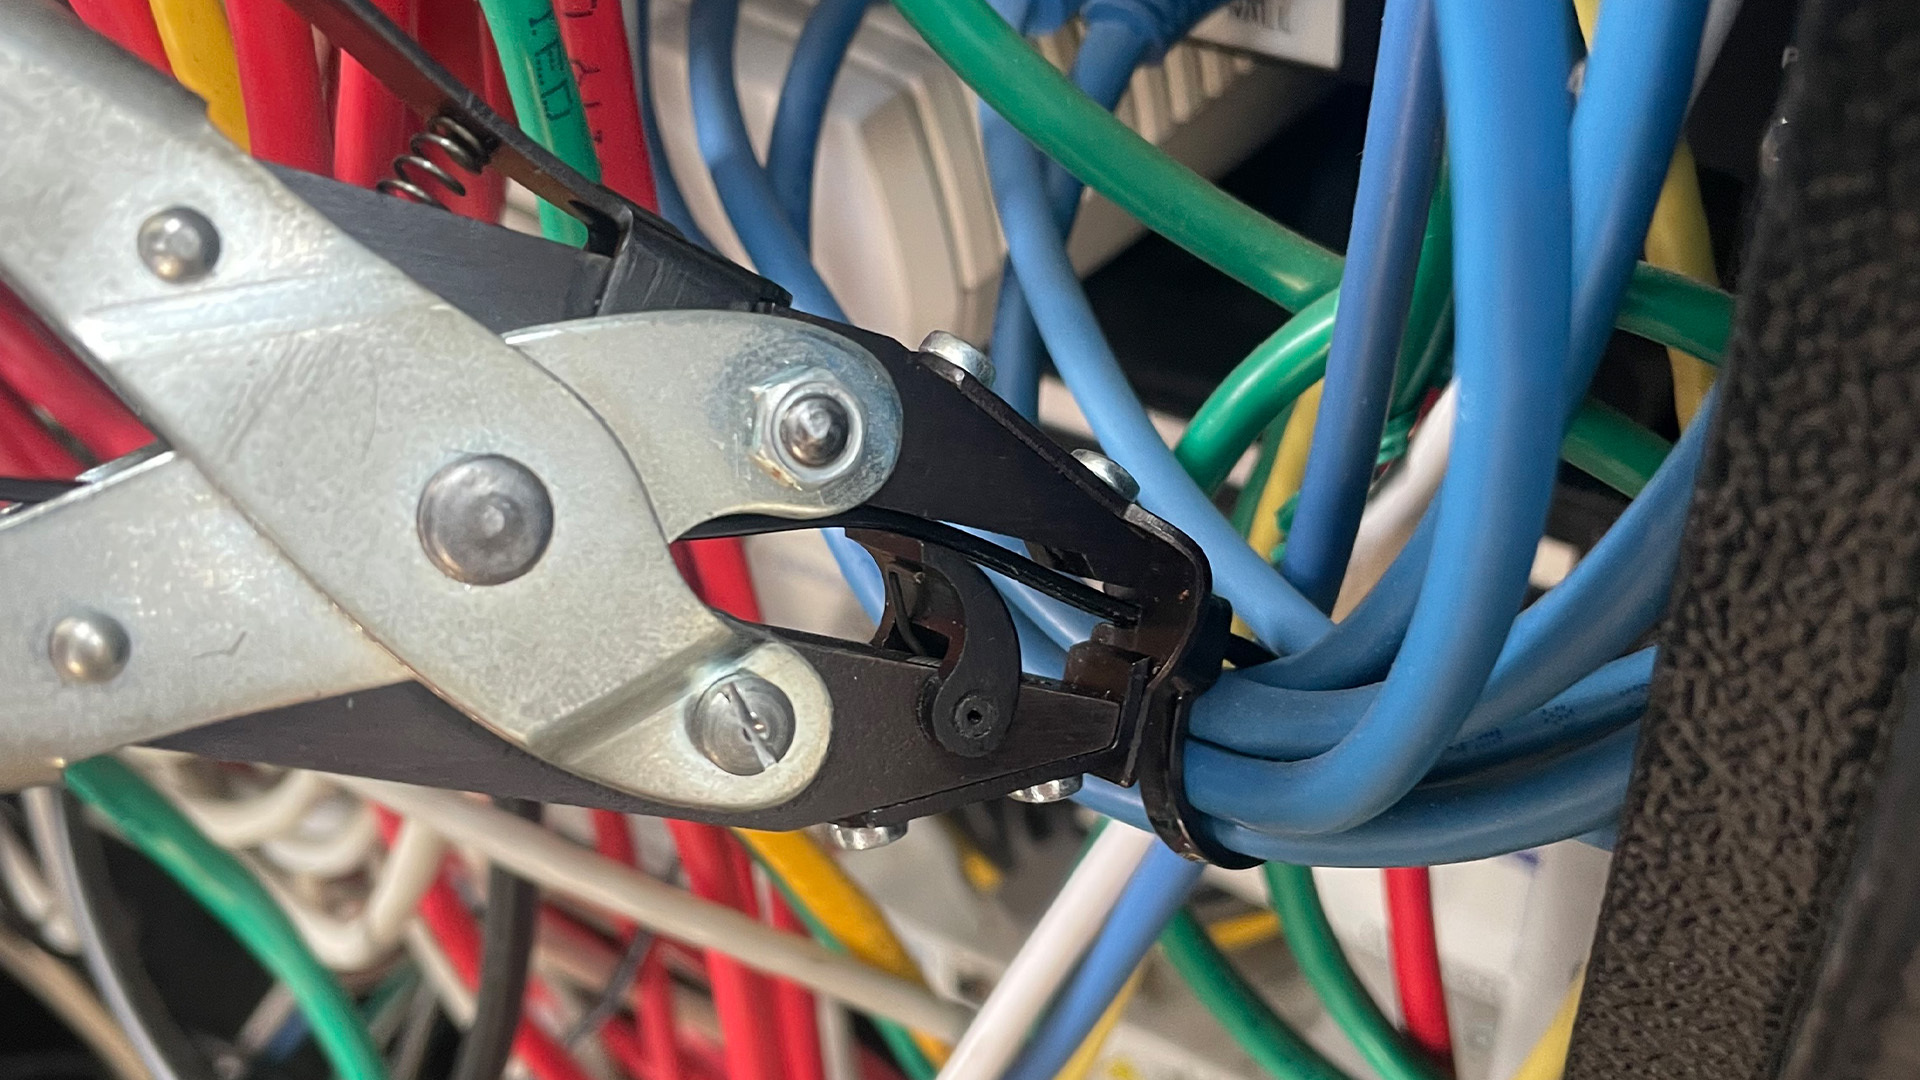
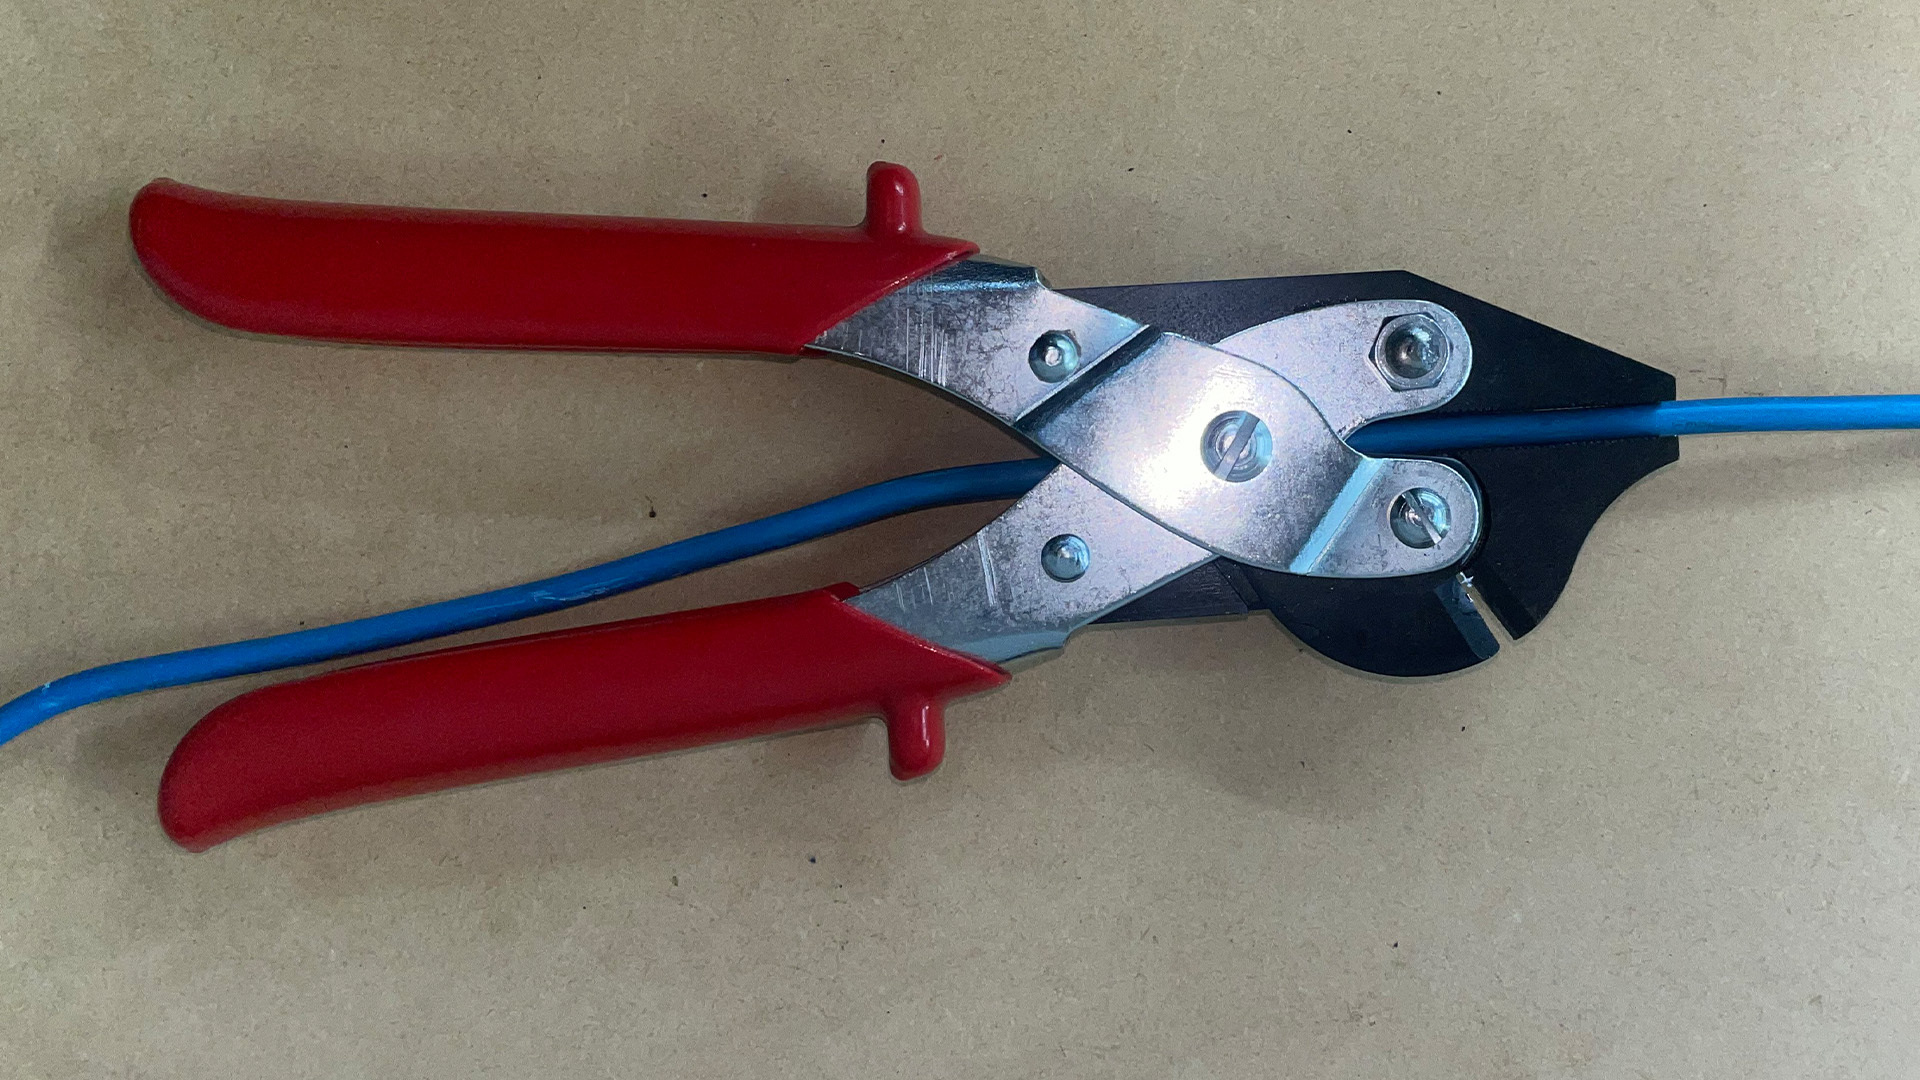
- You can tighten connections with a spanner, or alternatively to save time, use a pair of Side Cutter Parallel Pliers (as they’ll also be useful in creating cable exits, meaning you only need one tool).
- Grounding: Your cable trays should be connected to a grounding system to prevent static charge buildup.
Securely mounting the tray ensures it remains stable and functional under various conditions.
Step 5: Creating Cable Exits
Properly creating cable exits ensures that cables can leave the tray without damage and maintains the system’s overall integrity.
Some exits can simply be bent using the existing tray features, whilst others will need to be cut and filed to properly accommodate the new cabling.
- Marking Exit Points: Carefully plan where your cables will exit the tray, making certain they are well-supported immediately upon exit. Positioning exits near support points can reduce strain on the cables, and also make the installation look neater.
- Cutting the Tray: After marking exit points, cut the tray, and smooth any rough edges with a file to prevent damage to the cables. You should also add a protective coating to exposed metal to prevent corrosion, which is important for environments with moisture.
- Installing Edge Protectors: Use high-quality materials that can withstand environmental conditions to protect cables from sharp edges and stop them crossing over each other. This step is crucial in maintaining cable integrity over time.
Guaranteeing clean and protected cable exits prevents wear and enhances the durability of the system.
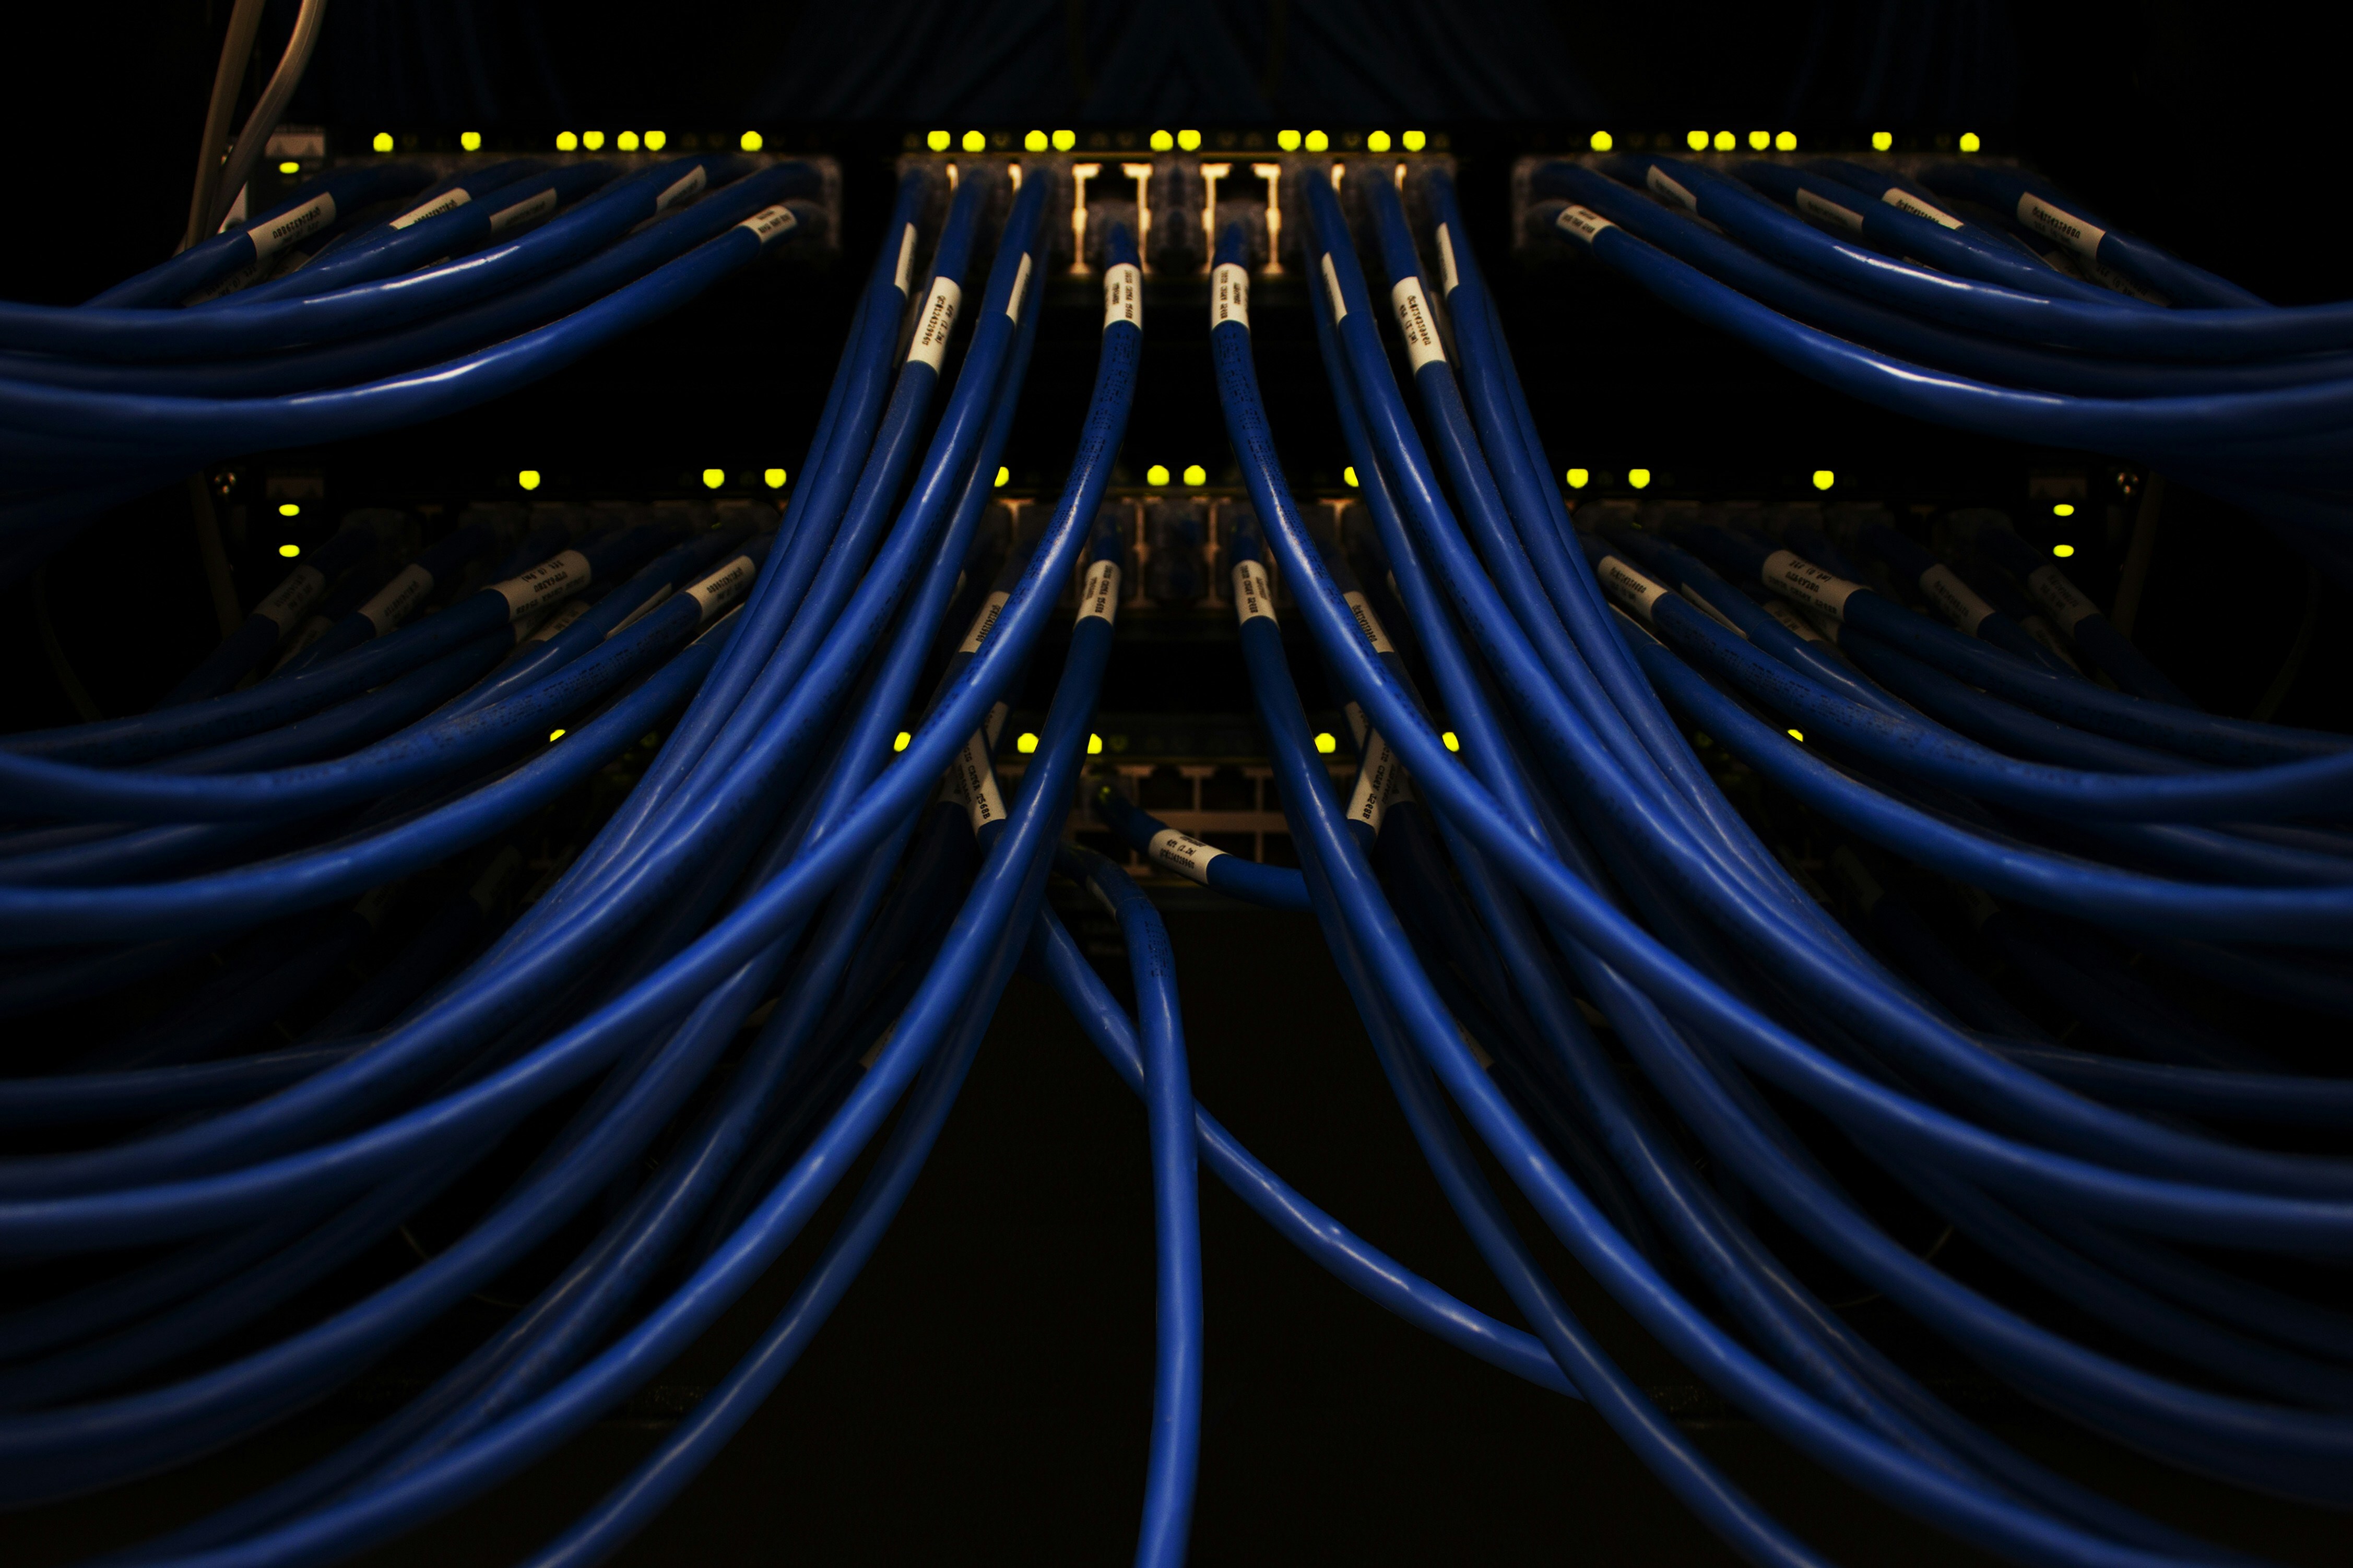
Step 6: Pulling Long Lengths of Cable
Handling long cable runs requires careful preparation and the right tools to prevent damage:
- Pre-Pull Preparation: Clear any debris from the tray itself, and look for potential snag points that would damage the cable if pulled under tension. Cable lubricant will reduce friction during the pull, which is useful if there are tight corners or lots of existing cables. Lay the cable out on the ground to ensure there are no kinks or twists.
- Tools to Pull Cable: To pull long lengths of medium to heavy cabling, use a mechanical cable puller. Align the puller correctly to prevent the cable from scraping against tray edges. Monitor tension with a dynamometer to avoid exceeding the cable’s rated limits and causing damage.
-
For making minor adjustments or pulling through light cabling, you can use the open-throat feature of the Maun Side Cutter Parallel Pliers, to quickly and efficiently pull the cable without damaging it (as the parallel-jaws provide an excellent grip without overly compressing the cable or damaging the insulation).
- Guiding the Cable: Manually guide the cable at bends or elevation changes to ensure it lays flat and doesn’t twist or kink. For longer stretches, pull the cable through in sections to prevent damage.
Proper cable handling during installation preserves cable integrity and ensures optimal performance.
Step 7: Securing Cables with Ties
Securing cables properly keeps them organised and protected, preventing issues down the line.
- Choosing the Right Cable Ties: Select ties based on the environmental conditions and the specific requirements of the cables. For example, use UV-resistant or stainless steel ties in outdoor or high-temperature settings.
- Spacing of Cable Ties: Secure cables at regular intervals, ensuring they are not overly compressed. This will allow for adequate heat dissipation and make it easier to service the cables (it also makes them visually more appealing).
- Securing the Cables: Use this cable tie installation plier for consistent tension and to trim excess tie length – this makes it look neater and prevents sharp edges that can snag cables or cut engineer’s hands. Organise cables by function, keeping power cables separate from data cables to minimize interference. Add labels for each cable to help with future maintenance.
Properly secured cables ensure a tidy installation and simplify future maintenance.
Step 8: Final Testing and Adjustments
The final phase ensures the system is fully operational and optimized for long-term performance.
- Inspect All Connections: Check all connections for strain relief and ensure cables are properly routed and secured. Look for any signs of damage that may have occurred during installation.
- Test the System: Use appropriate testing tools to check for insulation faults, signal integrity, and the absence of interference. Record baseline readings for future reference, providing a valuable tool for troubleshooting.
- Make Final Adjustments: Address any issues identified during testing, such as re-routing cables or tightening connections. Ensure all documentation reflects the final installation, aiding future maintenance efforts.
Thorough testing and adjustments ensure the system is ready for long-term use and meets all operational requirements.
Final Summary
Now you’re ready to install or oversee the install of new cable trays for your building’s wiring.
If you have any feedback or improvements you’d recommend for this post, we’d love to hear from you.
This post was brought to you by Maun, experts in tools since 1944.
Scroll back up to re-read any key points, browse our related pages below, or contact us with any questions: