


How to crimp bullet connectors on a classic car
Published by Rebekah Jackson, Digital Marketing Executive on 3rd Nov 2026
Brass bullet connectors join the wiring on British classic cars and motorcycles, from the Austin, Morris, Mini and MG to the Triumph, Norton and BSA. Each wire ends in a small brass bullet, and two bullets push into a snap connector to make the joint. When a harness section perishes, a joint goes intermittent or you add a circuit to an original loom, you need to fit new bullets, and each one has to be crimped on securely.
To crimp a bullet connector, strip enough insulation off the wire for the bare copper to reach the tip of the bullet. Set the brass bullet in the crimping tool, push the bare wire into it until the copper reaches the tip, and squeeze the handles firmly once. Then tug the wire to check it’s held.
Using the right crimping tool matters as much as preparing the wire. A standard terminal crimper can distort the bullet, so it won’t fit securely in its snap connector. Below, we explain why, how Maun’s Crimping Tool For Bullet Terminals solves it, and then walk through each step.
Why a Standard Terminal Crimper Lets You Down
A standard terminal crimper has no die sized to a 4.7 mm Lucas-style bullet, so it squashes the bullet oval. A squashed bullet doesn’t seat properly in its snap connector, and a poorly seated joint can’t be relied on.
An oval bullet only touches the snap connector over part of its surface. Poor contact causes resistance and heat build-up, and that can lead to intermittent faults: a flickering light or a dead ignition circuit that only shows up once the car is back on the road. It takes far longer to trace than a proper crimp takes to make. And a harness has dozens of these joints, so every one needs crimping the same.
How the Maun Bullet Crimper Keeps the Bullet Round
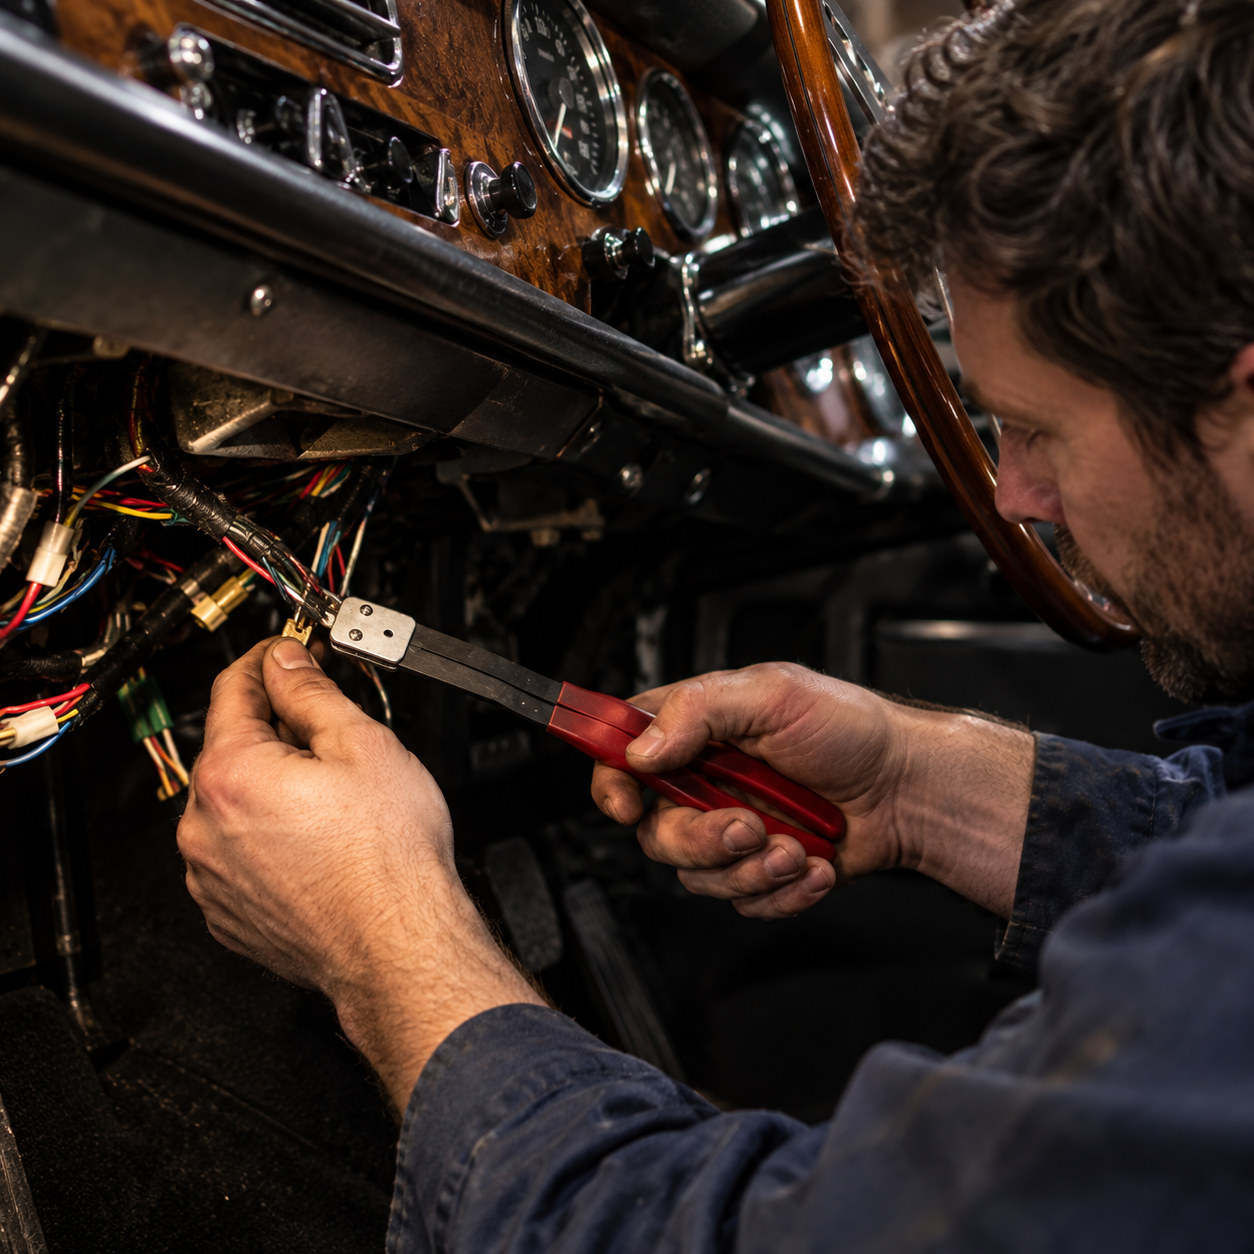
The Maun Crimping Tool For Bullet Terminals has precision-machined dies sized to the 4.7 mm bullet, so the crimp closes evenly around the barrel, and the bullet keeps its shape. The long handles multiply your hand force by 8, so you crimp every joint in a harness firmly without straining. It’s made in Nottinghamshire, England, and the result is a period-correct joint that stays put.
Use the Maun Bullet Crimper for full wiring jobs and small ones, from re-looming a 1958 Triumph T100 to plugging high-level brake lights on a Morris Traveller into the original loom.
What You Need to Crimp a Bullet Connector
You need five things: crimp-type brass bullet connectors, cable of the right size, a wire stripper, a crimping tool with a die for the bullet, and a tool to push the bullet into its snap connector.
- Crimp-type bullets, not solder-type. Some brass bullets are made to be soldered and aren’t designed to be crimped. Check what you’ve bought before you start.
- Cable up to 2 mm² (14 AWG). That’s the range the Maun Bullet Crimper is made for. It works best on cable of around 1.0 mm² and above, as thinner wire may not grip securely.
- A wire stripper that removes insulation cleanly without nicking the strands.
- A bullet crimper with a die sized to the 4.7 mm bullet.
- A Bullet & Snap Connector Insert Tool to push the finished bullet into its snap connector.
How to Crimp a Bullet Connector, Step by Step
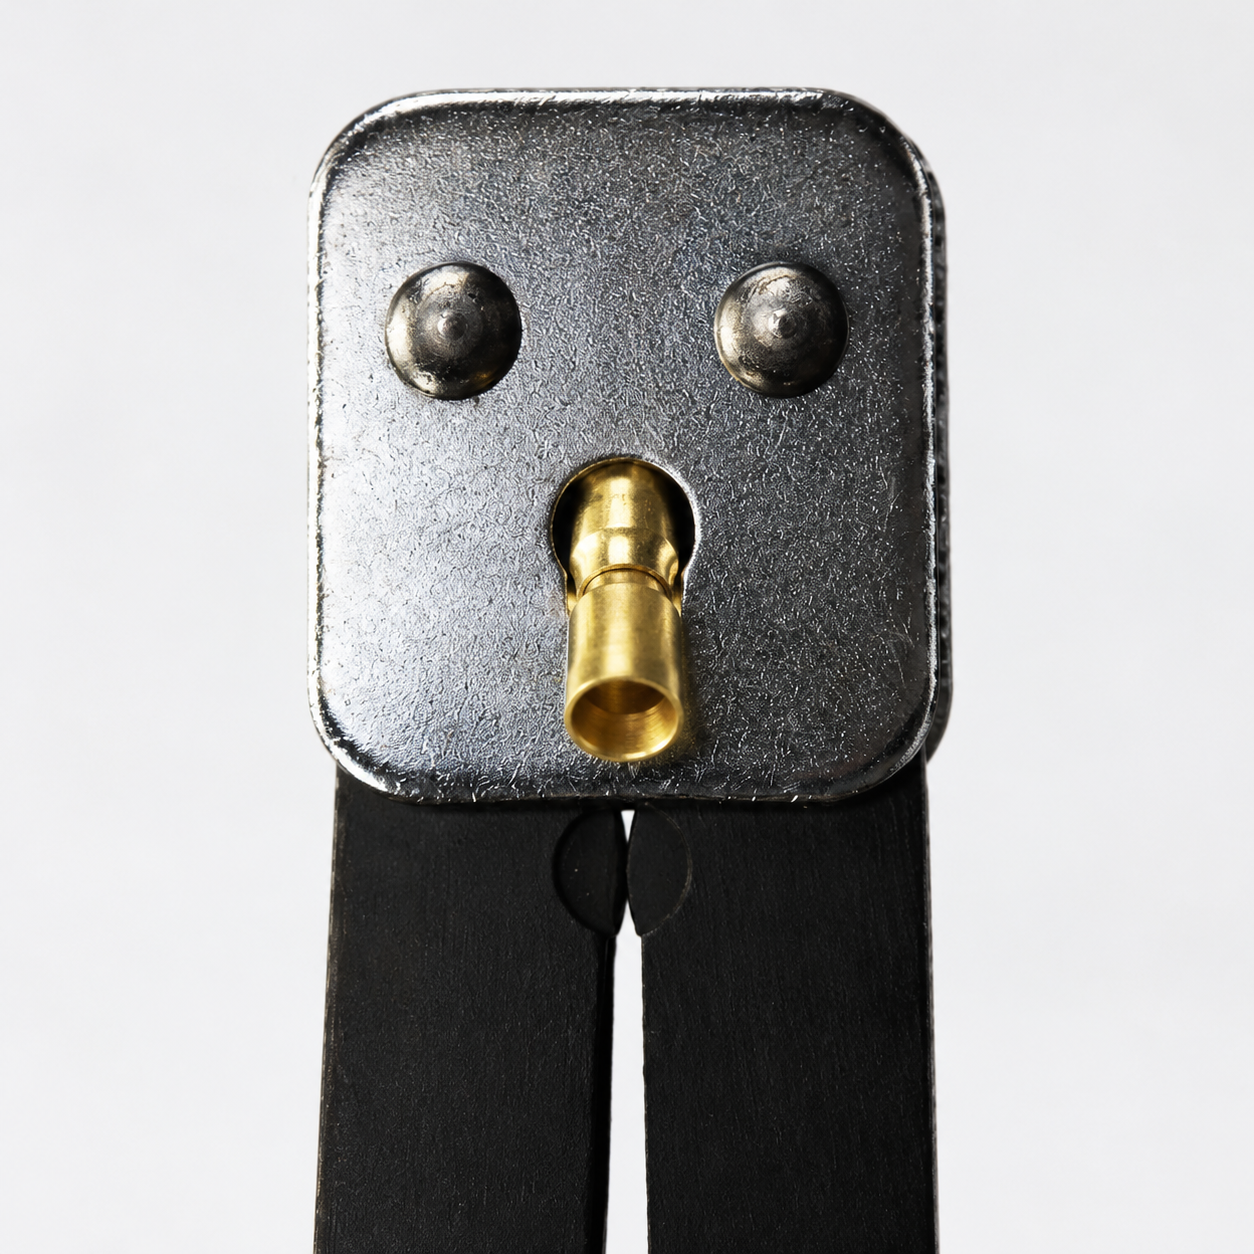
Before you start, disconnect the battery.
- Strip the cable. Hold the bullet alongside the wire end to measure, and strip enough insulation for the bare copper to reach the tip of the bullet. Twist the strands lightly so none stray.
- Set the bullet in the tool. Place the bullet in the receptor hole of the crimper, so the die will close on the bullet’s barrel.
- Insert the wire. Push the stripped wire fully into the bullet, making sure every copper strand is inside and the insulation meets the end of the barrel.
- Close the handles firmly, in one squeeze. Squeeze to resistance and stop. Leaning on the handles after the die has closed crushes the bullet.
- Tug the wire. Give it a firm pull. If it moves, cut the bullet off and start again with a new one.
- Check the bullet is still round. If it’s been squashed, cut it off and start again.
- Connect it. Use Maun’s Bullet & Snap Connector Insert Tool to push the bullet into the snap connector until it seats, then check the circuit works before you tidy the loom.
Check that the finished bullet seats securely in its snap connector. A properly made joint should stand up to the vibration of everyday driving. Done right, first time.
How to Replace an Old Bullet Connector
Cut the old bullet off, cut back to clean copper and crimp a new bullet on. A crimped bullet has already been shaped once, so don’t try to reuse it.
- Pull the bullet out of its snap connector, then cut the wire just behind the bullet.
- Check the copper. If it’s dark or green with corrosion, cut back further until you reach bright, clean copper. A new bullet on corroded wire gives you the same fault again.
- Check the insulation. If it’s cracked, brittle or crumbling, the cable needs replacing, not just the bullet.
- Check the slack. Cutting back shortens the wire. Make sure it still reaches the snap connector without pulling tight.
Then crimp the new bullet on, following the steps above.
Common Bullet Crimping Mistakes
These five mistakes lead to unreliable bullet joints, and each one is easy to avoid.
- Over-crimping. It’s the easiest mistake to make. Leaning on the handles after the die has closed squashes the bullet. Squeeze to resistance and stop.
- Stray strands. A strand left outside the bullet weakens the joint and leaves bare copper exposed. Twist the strands before you insert the wire, and check every one is inside.
- Insulation in the crimp. If the insulation goes into the bullet, the die crimps plastic instead of copper and the wire pulls out. Strip enough for the bare copper to reach the tip, and no more.
- Using a solder-type bullet. Some bullets are made to be soldered, not crimped. Check what you’ve bought before you start.
- Cable that’s too thin. As noted above, wire below about 1.0 mm² may not grip securely. The tug test in step 5 will tell you.
Should You Crimp or Solder Bullet Connectors?
Crimp if you want a neat, even joint you can make in a tight space; solder if your restoration specification calls for soldered joints. Classic car restorers find crimping easier than soldering under a dashboard or in a confined engine bay, because there’s no hot iron near the loom and the tool holds the bullet while you work.
Soldering has its place. Some bullets are solder-type and must be soldered, and some restorers solder as well as crimp. If you’re restoring to an original specification that calls for soldered joints, follow it.
When the Maun Bullet Crimper Isn’t the Right Tool
The Maun Crimping Tool For Bullet Terminals does one job: crimping non-insulated 4.7 mm brass bullets on cable up to 2 mm². It isn’t right for:
- Modern insulated terminals. Spades, rings and insulated bullets need an insulated-terminal crimper with colour-coded dies.
- Cable above 2 mm². Thicker cable needs a terminal and a crimper rated for it.
- HT ignition leads. These need a different die form. Use Maun’s Crimping Tool for HT Auto Ignition Terminals instead.
- Soldered-joint specifications. Where the restoration calls for soldered joints, solder them.
- The odd joint. It’s a single-purpose tool. If you only have one or two joints to make, the tool may cost more than the job justifies, though restorers working through a loom will use it dozens of times.
FAQs
Can you crimp bullet connectors with pliers?
Pliers have no die sized to the bullet, so they tend to deform it rather than produce a consistent, secure crimp. A deformed bullet may not seat fully in its snap connector.
Why is my bullet connector loose in the snap connector?
Usually the bullet has been squashed out of shape, either by a standard terminal crimper or by over-crimping. Cut it off, fit a new bullet and crimp it with a die sized to the 4.7 mm bullet, stopping once the die has closed.
What size are classic car bullet connectors?
The Lucas-style brass bullets used on British classic cars and motorcycles are 4.7 mm. They take cable up to 2 mm² (14 AWG), and they join by pushing into a snap connector.
Do you need to solder a crimped bullet connector?
Not if the crimp is right: a properly crimped crimp-type bullet holds the wire on its own. Some restorers add solder as well, and solder-type bullets must be soldered. Follow your restoration specification where it says which to use.
Final Summary
Crimping bullet connectors comes down to three things: preparing the wire, using a tool designed for the terminal and checking the finished connection. Get these right, and you’ll have a secure joint that fits properly into the original wiring loom.
If you have any feedback or improvements you’d recommend for this post, we’d love to hear from you.
This post was brought to you by Maun, specialist plier makers since 1944.
Scroll back up to re-read any key points, browse our related pages below or contact us with any questions:
Crimping Tool For Bullet Terminals
What Are Crimping Tools and How Are They Used?
Bullet & Snap Connector Insert Tool
About the author
Rebekah Jackson is Digital Marketing Executive at Maun Industries, the family-owned toolmaker that has made pliers and hand tools in Nottinghamshire, England, since 1944. She joined Maun in 2015 and has worked across all aspects of the business since, including assembling tools in the factory, which is why her guides start from the jobs people actually use Maun tools for. She writes Maun’s knowledge-base guides, with every specification checked against Maun’s published product data.
Published: 03.11.26 · Last updated: 03.11.26